You can verify your GCash account using a Digital National ID through the eGovPH app, even if you do not yet have the physical National ID card. GCash officially accepts the Digital National ID, printed ePhilID, and physical National ID as valid proof of identity for account verification in 2026.
To complete verification, you need screenshots of the front and back of your Digital National ID, your PhilSys ID number, a stable internet connection, and clear lighting for the selfie and PSA face scan steps. The process includes live selfie verification, uploading your Digital National ID screenshots, completing a separate PSA face scan, and filling out your personal and work details inside the GCash app.
Once your account is fully verified, you can unlock higher wallet limits, send and receive larger amounts, transfer money to banks, use GSave, GInvest, GInsure, international remittance features, and access other premium GCash services that are not available for Basic accounts.
This step-by-step 2026 guide explains how to verify GCash using a Digital National ID, how long approval takes, common verification problems, and tips to avoid rejection during the process.
Can I Verify GCash Using a Digital National ID?
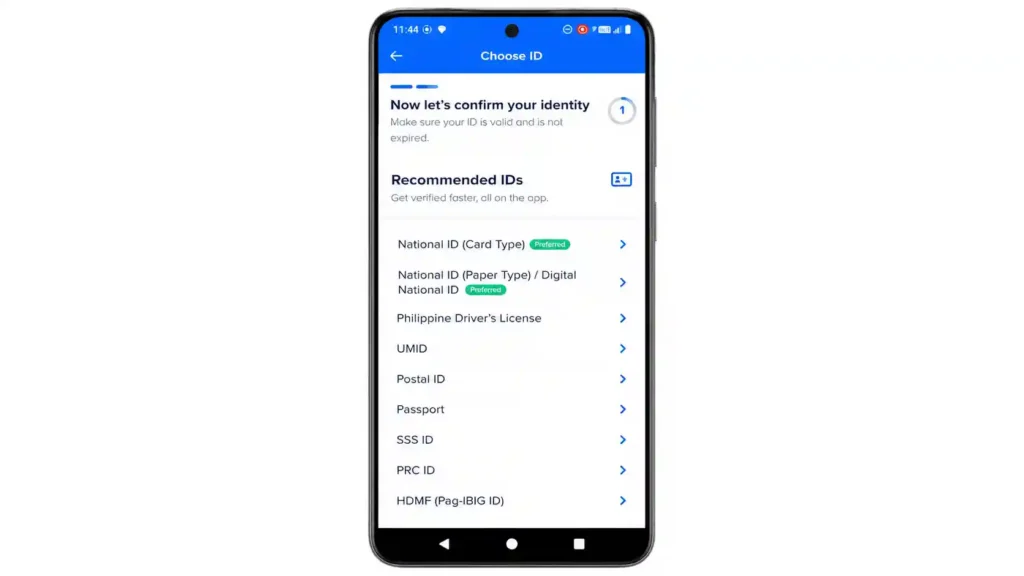
Yes, GCash accepts it. The Digital National ID is included in GCash’s own list of recommended IDs. When you reach the ID selection screen, you’ll see three options listed in GCash’s preferred order: the physical National ID card, the printed ePhilID on paper, and the Digital National ID from the eGovPH app.
All three are valid. BSP Memorandum 2025-012, issued to all BSP-Supervised Financial Institutions, requires the acceptance of all formats of the National ID as valid and sufficient proof of identity in financial transactions. So even if GCash “prefers” the physical card, the digital version works just the same.
What You Need for GCash Account Verification?
One important thing to know before you begin: GCash has a session timeout. If you take too long filling in your details, GCash will stop the process and you’ll have to start from the very beginning. So prepare everything in advance. Here’s what to have ready:
Screenshots of both the front and back of your Digital National ID from the eGovPH app, saved to your phone’s gallery
Your National ID number written down somewhere, because you’ll need to type it in manually during the process
Your complete current address, place of birth, and work details ready to fill in
Good lighting and a clean background for the two selfie and face scan steps
A stable internet connection throughout
How to Verify GCash Using Your Digital National ID?
To verify GCash by using your digital National ID follow the steps given below:
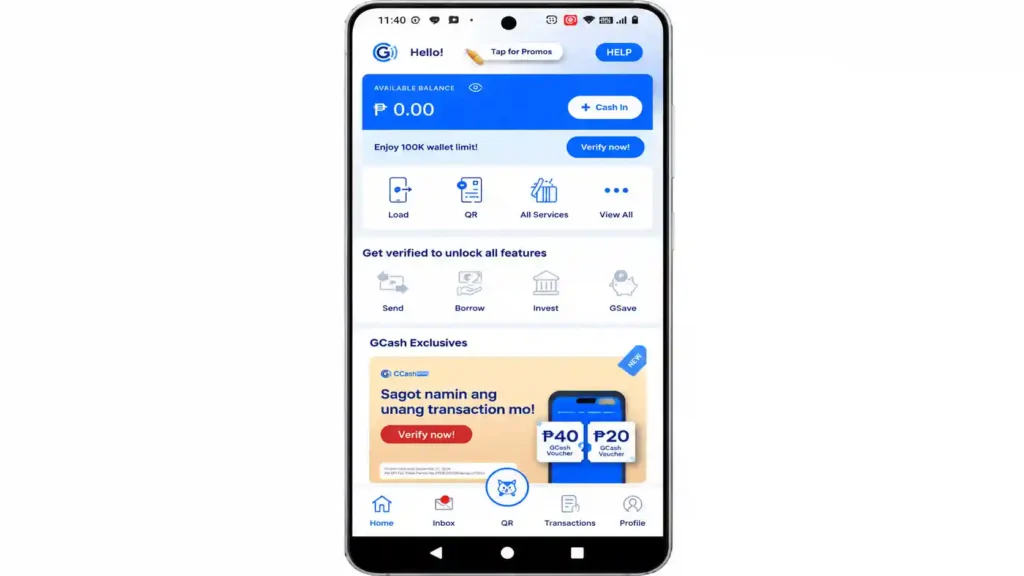
Step 1: Open GCash and Tap Verify Now
Open GCash and log in.
You’ll see a “Verify Now” banner or button on your home screen. Tap it.
Step 2: Tap Verify Now Again
A bottom sheet slides up. Tap Verify Now one more time at the bottom of that screen.
Step 3: Read the Requirements
Read through all the requirements and reminders on screen, then tap Next.
Step 4: Enter Your Authentication Code
Enter the 6-digit authentication code sent to your mobile number, then tap Next.
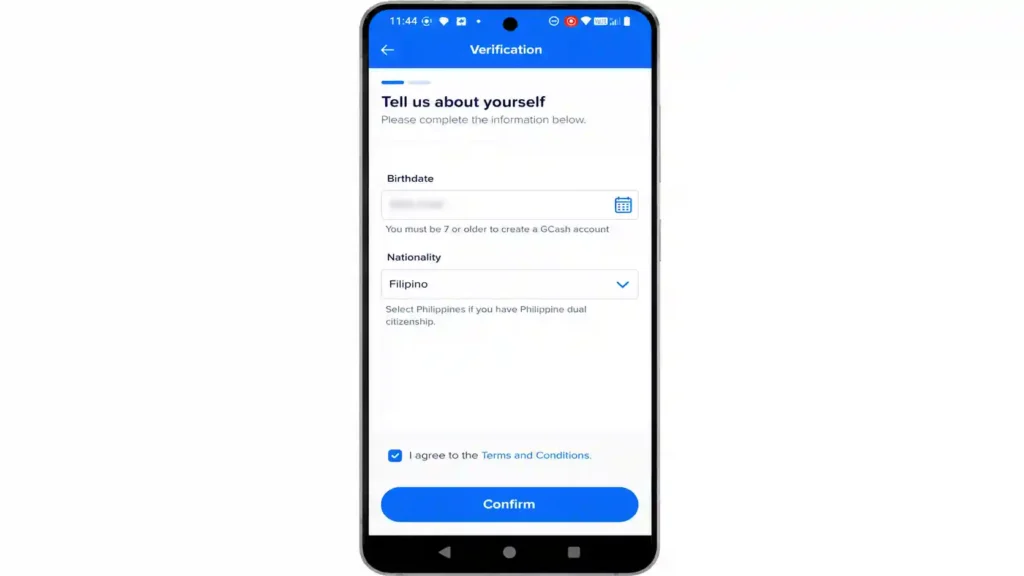
Step 5: Tell Us About Yourself
This is the first “Tell us about yourself” screen. You’ll see three things to fill in:
Tap the birthday field (calendar icon) and select your birthday
Select your nationality (Filipino)
Tick the “Agree to Terms and Conditions” box
Tap Confirm when done.
Step 6: Select Digital National ID
In the next step you will be asked to confirm your identity.
To confirm your identity you can use the following IDs listed below:
Step 7: Enter Your Name and Birthday or PhilSys Card Number
Then you will be asked to enter your full name and date of birth, or your PhilSys card number.
Fill in the details, then tap Confirm.
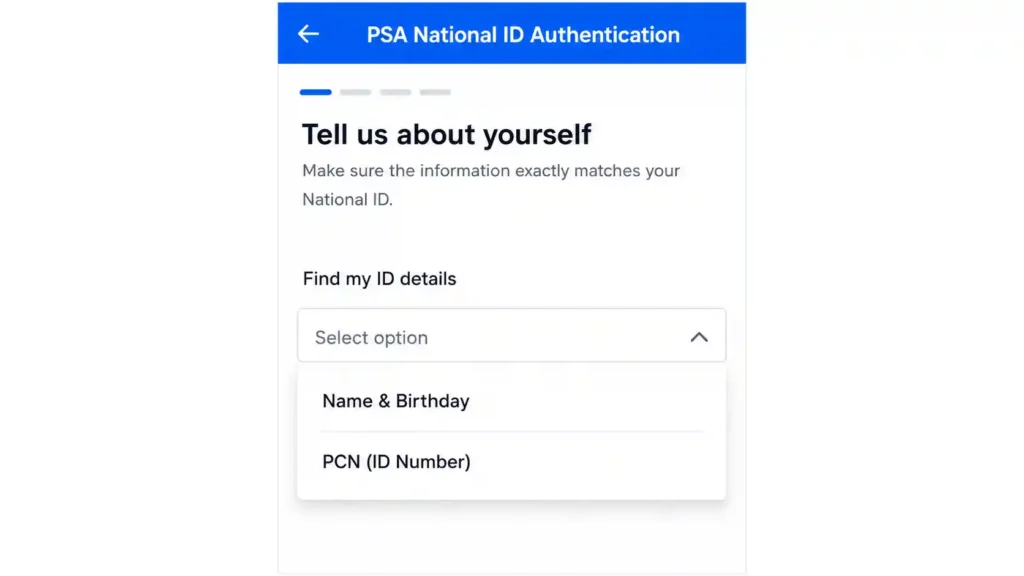
Step 8: Find Your ID Details
Then you will be asked to choose Tell us about yourself” or “Find my ID details” .
Tap the dropdown and choose between two options
If you choose find my ID details then system will automatically fetch your Name and birthday, and PCN ID number.
If you chose tell us about yourself option then enter the Name and birthday, fill in your first name, middle name, and last name and tap next.
Choose whichever you prefer.
Step 9: Take Your GCash Live Selfie
Then you need to “Take live selfie.”
Tap “Start liveness” at the button.
Hold your phone close to your face.
Make sure your lighting is good and your face is clearly visible. Follow the on-screen prompts.
Step 10: Continue
The screen says “You’re almost done.” Tap Continue.
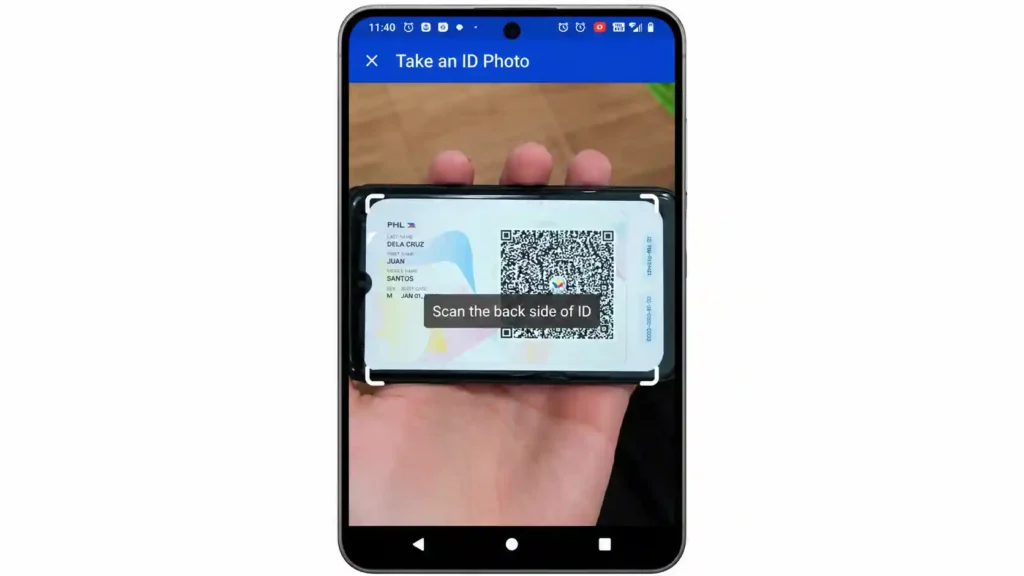
Step 11: Take a Photo of Your Digital National ID
Now it’s time to submit your ID.
You need another phone to take picture or scan Digital National ID.
Either open your eGovPH app and take picture or use save screenshots for GCash verification.
Upload the front of your Digital National ID and align it inside the on-screen box until it locks in.
Then do the same for the back. GCash requires both sides.
Make sure both screenshots are clear, fully loaded, and not cropped.
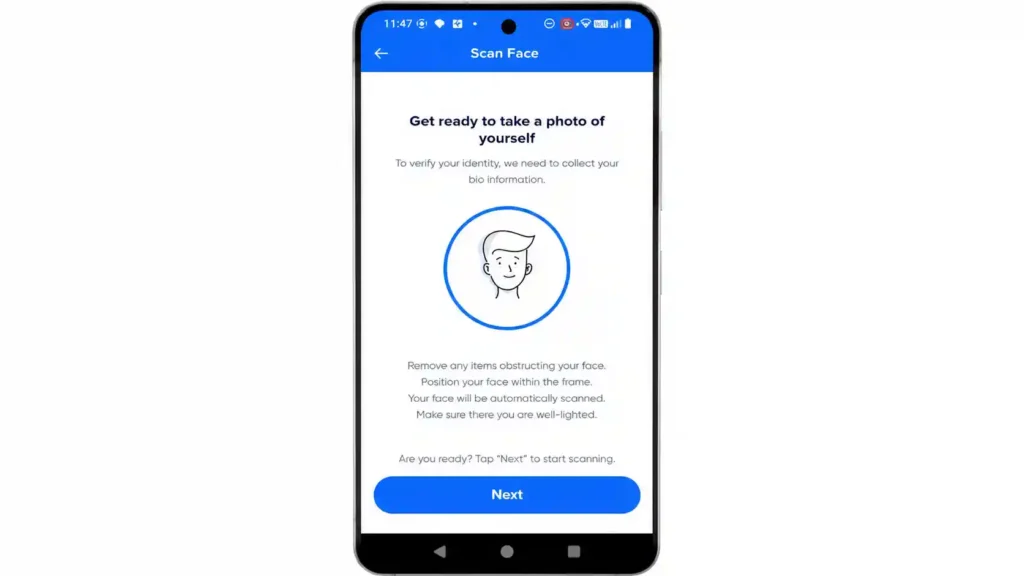
Step 12: Complete the PSA Face Scan
After you upload your ID photos, then next step is to “Scan face.”
This is a separate face verification step that matches your records with the Philippine Statistics Authority (PSA). It’s different from the GCash selfie you took in Step 9.
Tap Next.
In the next steps “Get ready to take a photo of yourself” and tap Next again.
Follow the on-screen instructions carefully.
When you’re done, GCash automatically redirects you to a Verification screen. Tap Next to continue.
Step 13: Fill in Your Personal Details
This is the longest part of the process. in this step you need to fill in personal information. There are four sections to complete.
ID details:
Your ID type is already auto-filled.
In the ID number field, type your National ID number carefully.
Double-check every digit because errors here can cause your verification to fail.
Basic information:
Salutation: choose Mr. or Mrs. from the dropdown
Name: First name, Middle name, Last name (if you have no middle name, tick “I do not have a middle name”)
Nationality: auto-filled
Civil status: choose from the dropdown (for example, Single)
Birth date: auto-filled
Contact number: auto-filled with your GCash number
Place of birth: Country (Philippines), Province, City
Current address: Province, City or Municipality, Barangay, Zip code (auto-filled), House number and street address. Use the same address registered on your GCash account.
Work details
Employment type: choose from the dropdown
Role: choose from the dropdown
Employer or business name
Nature of work
Source of funds (for example, Salary)
Expected monthly transaction
Main purpose of opening the account (for example, Send money)
Other information
“Are you or your child a politically exposed person (PEP) or a relative or close associate of a PEP?” Tap No.
“To establish beneficial ownership, are you the actual owner of the account?” Tap Yes.
Tap Confirm when all four sections are done.
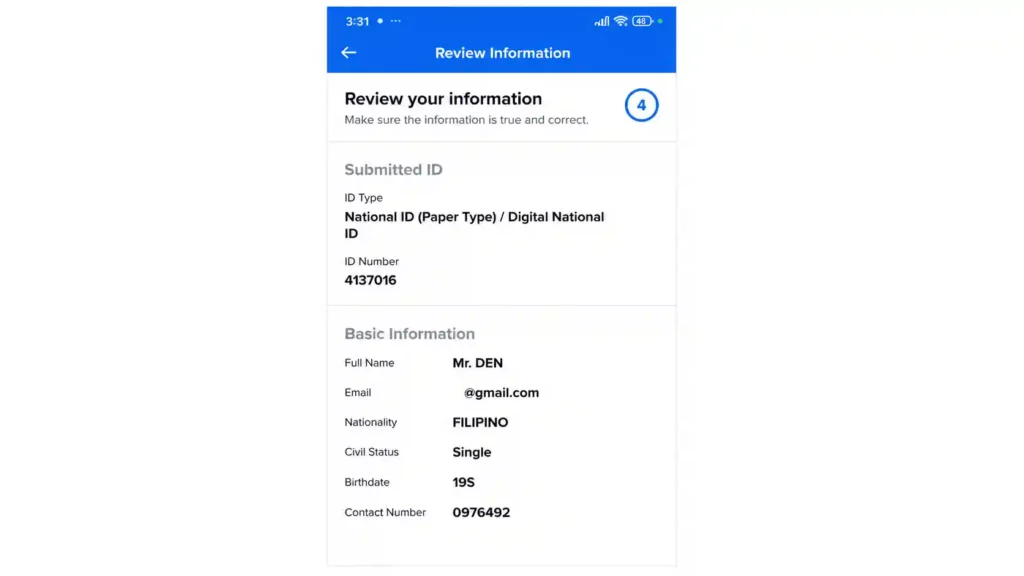
Step 14: Review Your Information
GCash shows you a full summary of everything you entered. Go through it carefully.
If something’s wrong, correct it now.
When everything looks right, tap Confirm.
Step 15: Wait for the SMS
then your account will be submitted for review and GCash will review your account.
You will receive an SMS and email within 3 days on the status of your account verification.
Although GCash officially says account verification process can take up to 3 days, but many users receive the confirmation much faster. One Filipino vlogger who documented the process received the fully-verified SMS in about 40 minutes. Your experience may vary, but it’s often quicker than the official estimate.
Once you get the SMS, go back to Profile you’ll see that your verification is complete.
Why Verify Your GCash Account?
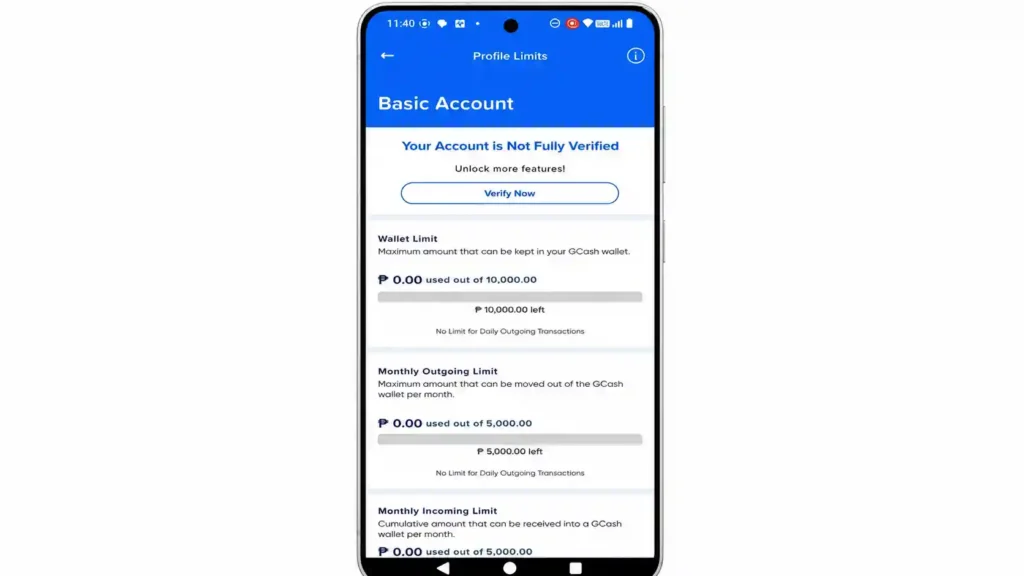
When you create a GCash account for the first time, your account is automatically set to a Basic Profile. A Basic Profile allows you to access some of GCash’s core features, but it also comes with certain restrictions, including lower wallet limits, reduced transaction amounts, and limited access to advanced services.
You can easily check your current account status and limits by opening the GCash app, tapping Profile, and then selecting Profile Limits. This section shows how much money you can store, send, receive, or cash in using your current verification level.
To unlock the full GCash experience, you need to complete the verification process and upgrade to a fully verified account. Once verified, many of the restrictions on your account are removed, allowing you to enjoy higher wallet and transaction limits, faster and more secure transfers, and access to premium financial services.
A fully verified GCash account also gives you access to features such as Express Send Money, bank transfers, GSave, GInvest, GInsure, international remittances, online payments, and many other services that are not available to Basic users. Verification also helps improve account security and makes your account more trusted for larger transactions.
Tips for a Successful Selfie and Face Scan
These are GCash’s own tips for getting both face verification steps right:
Use good lighting and take your selfie in a bright area. Choose a simple background with no people. Make sure your face is clear and fully visible. Remove glasses or face masks. Follow the steps shown in the app, like blinking, and hold your phone as directed.
The vlogger who documented this process also recommends making sure your camera lens is clean and that you’re in a steady position when taking both the GCash selfie and the PSA face scan.
Tips for a Clear ID Image
Use the actual screenshot from your eGovPH app, not a photocopy or a photo of a screen.
Make sure the screenshot is fully loaded with no blur, no screen glare, and all details clearly readable.
The ID must fit within the on-screen box when you submit it.
You’ll need both the front and the back, so take both screenshots before you start.
Take the photo in a bright area and avoid using flash.
The details on your ID must exactly match what you entered in the form.
What If GCash Is Not Accepting Your Digital National ID?
Double-check that the name, birthday, and ID number you entered match your National ID exactly. Make sure your internet connection is stable throughout the process.
If verification was rejected, you can resubmit within 10 days through the GCash app. Miss that window and you’ll need to restart the entire process. After resubmitting additional documents, expect a further SMS update within 4 days.
If the Digital National ID still doesn’t work, you can try a different accepted ID.
What If GCash Times Out?
If you’re too slow filling in the details, GCash may time out the session. When that happens, verification stops and you go back to the beginning. This is why preparing everything beforehand matters. Have your screenshots ready, know your ID number, and have your address and work details at hand so you can move through the form without stopping.
What If I Don’t Have a National ID Yet?
If you don’t have any accepted valid ID, GCash recommends getting a National ID. If you’ve already registered at a PSA center but haven’t received your physical card yet, download your Digital National ID through the eGovPH app and use that instead.
Quick Summary
What You Need
Details
App for Digital ID
eGovPH app
Screenshots needed
Front and back of your Digital National ID
GCash steps
Profile, then Verify Now (twice)
ID formats accepted
Physical card, printed ePhilID, Digital National ID
Face scan steps
Two: GCash live selfie and separate PSA face scan
ID number
Enter manually, must be accurate
Personal info form
Includes work details, address, source of funds, PEP question
Initial SMS update
After 3 days (often faster in practice)
Follow-up if no update
Use follow-up link in GCash app; support responds within 24 hours
Additional document review
Within 4 days after resubmission
Cost
Free
Conclusion
Verifying your GCash account using a Digital National ID is now one of the easiest ways to unlock all GCash features without waiting for the physical National ID card. As long as your details match your PhilSys records and your ID screenshots are clear, the process can usually be completed directly from your phone in just a short time.
Before starting, make sure you already have your Digital National ID screenshots saved from the eGovPH app, your National ID number ready, and a stable internet connection to avoid session timeouts. Pay extra attention during the selfie, PSA face scan, and personal information steps because even small mistakes can delay approval or cause rejection.
Once your account becomes fully verified, you can enjoy higher wallet limits, bank transfers, online payments, savings and investment features, international remittances, and many other GCash services that are restricted for Basic accounts.
If GCash verification does not get approved immediately, you can still resubmit your documents through the app and try again using the same Digital National ID or another accepted valid ID.
Frequently Asked Questions
Yes. The Digital National ID from the eGovPH app is accepted just like the physical card.
Yes. GCash asks for both sides. Take screenshots of both before you start.
Not necessarily. You can take screenshots of your Digital National ID and upload them directly, so one phone is enough.
GCash says to expect an SMS update within 3 days. In practice, many users receive confirmation much sooner, sometimes within the hour. After 3 days with no message, use the follow-up option in the GCash app to contact the support team, who’ll respond within 24 hours. If additional documents were requested after rejection, allow another 4 days after resubmitting.
The first selfie is GCash’s own live selfie check. The second face scan is a separate PSA verification that matches your face with your National ID records. You need to complete both.
Yes. The eGovPH app requires biometric authentication (Face ID or fingerprint) plus a 6-digit MPIN, which makes it much harder to misuse compared to a lost physical card.
Using your Digital National ID for DFA passport application is now one of the easiest ways to apply for or renew a Philippine passport in 2026. The Department of Foreign Affairs officially accepts the Digital PhilID and ePhilID as valid primary IDs, which is a huge help for applicants who still have not received their…
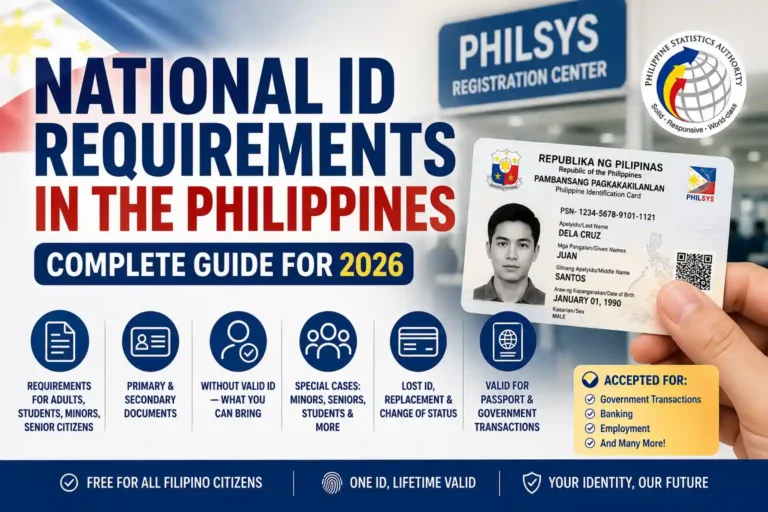
The requirements for a Philippine National ID are not the same for everyone. What a first-time adult applicant needs is different from what a parent brings for a minor, or what a senior citizen can use. And if you are going for the Digital National ID through the eGovPH app, the requirements are completely different…
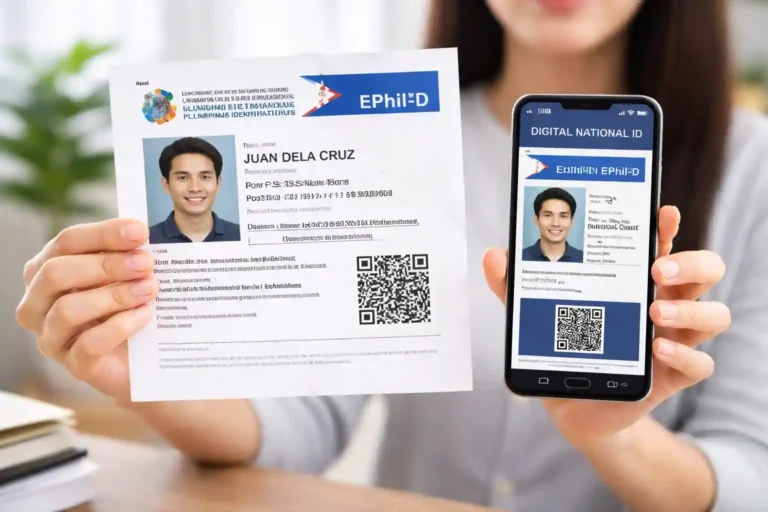
Still waiting for your physical PhilSys card to arrive? You don’t have to. The National ID Digital copy lets you access your official ID instantly on your phone, with your photo, PSN, and a scannable QR code ready to use anytime. Thousands of Filipinos are already skipping the long wait and using their digital national…
Need a National ID in the Philippines right now? Here’s the fastest way to register in 2026. You no longer need to rely on slow or confusing online registration. Today, national ID registration is quick, free, and mostly done through walk-in centers. In many cases, you can finish the process in under 20 minutes and…
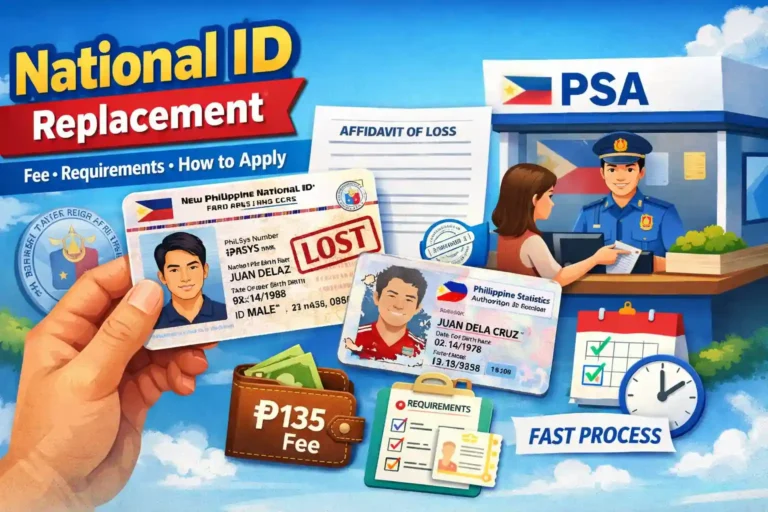
National ID replacement is the process of getting a new Philippine National ID card if your original one is lost, stolen, or damaged. Since the PhilSys ID is one of the most important government IDs in the country, losing it can make many transactions difficult. You may need it for banks, government services, mobile wallets…
If you have already registered for the Philippine National ID, the next thing you are probably looking for is how to get ePhilID quickly. The good news is you do not have to wait months for the plastic card to arrive. You can claim your printed paper National ID much faster and start using it…